
Hallo mannen en vrouwen, Leo hier. The topic today is all the Timer Types in Swift and examples of Timers.
We’ll explore one thing that eventually everybody comes across in app development that is some tasks should be done from time to time OR some tasks delayed in the future. We are talking about timers and how can we implement them.
Let’s code! But first…
The Painting of The Day
Today’s painting would be a Salvador Dali inspiration. But instead of using 1931 The Persistence of Memory painting which is very famous and important for the surrealism movement, I choose the 1952 painting called The Disintegration of the Persistence of Memory. In the later painting, Dali recreated the famous one but in this version, the landscape from the original work has been flooded with water. The disintegration depicts what is occurring both above and below the water’s surface.
Salvador Domingo Felipe Jacinto Dalí i Domènech , 1st Marquess of Dalí de Púbol, was born 11 May 1904 and died 23 January 1989. He was a Spanish surrealist artist renowned for his technical skill, precise draftsmanship, and striking and bizarre images in his work.
No one would be more suited than Dali for the post about… Timers.
The Problem – Timer Types in Swift
You need to run a function ( or a piece of code) every 2 seconds.
First of all, it’s important to notice that are two main ways to create a timer in Swift with Foundation Framework and one way to create with Combine Framework. The long way and the short way.
In a long way, you first create a Timer object, then you have to add it into a Runloop and after that, you need to fire it (if you are using the Date initializer and want it to fire early).
In a short way, you just need to use one of the class functions of Timer, and voi lá, everything is set.
Let’s check both and you can decide later what best suits your needs.
First, create a new app and replace de default ViewController code with this:
class ViewController: UIViewController {

    private let label = UILabel()
    private var timer = Timer()

    override func viewDidLoad() {
        super.viewDidLoad()
        label.text = "text"
        label.frame = CGRect(x: 0, y: 0, width: 80, height: 80)
        label.center = view.center
        view.addSubview(label)

        // timer code will be here

    }
}
The setup is done, let’s start with the examples.
The Long way example of Timer Types in Swift
The long way consists of two or three steps:
- Create a Timer object
- Add it to a RunLoop
- (optional) fire yourself it if you want.
The code for the three steps would be:
timer = Timer(timeInterval: 2, repeats: true, block: { timer in
    self.label.text = "\(Int.random(in: 1...10))"
}) // create the Timer object

RunLoop.current.add(timer, forMode: .default) // add it to the current default RunLoop
timer.fire() // fire the Timeeeer!
And for two steps:
timer = Timer(fire: Date(), interval: 2, repeats: true, block: { timer in
    self.label.text = "\(Int.random(in: 1...10))"
}) // create the Timer object with a date

RunLoop.current.add(timer, forMode: .default) // add to the current default RunLoop
The code is pretty straightforward and it’s interesting to know what the RunLoop is.
A RunLoop object processes input for sources, such as mouse and keyboard events from the window system and Port objects. A RunLoop object also processes Timer events.
Your application neither creates nor explicitly manages RunLoop objects. The system creates a RunLoop object as needed for each Thread object, including the application’s main thread. If you need to access the current thread’s run loop, use the class method current.
Note that from the perspective of RunLoop, Timer objects aren’t “input”—they’re a special type, and they don’t cause the run loop to return when they fire.
In short terms, the RunLoop is an abstraction that (among other things) provides a mechanism to handle system input sources (sockets, ports, files, keyboard, mouse, timers, etc).
You can also run other objc annotated methods with your Timer, like the example below replace the viewDidLoad and add a new function:
override func viewDidLoad() {
    super.viewDidLoad()
    label.text = "text"
    label.frame = CGRect(x: 0, y: 0, width: 200, height: 80)
    label.center = view.center
    view.addSubview(label)

    timer = Timer(timeInterval: 2, target: self, selector: #selector(timerAction), userInfo: nil, repeats: true)

    RunLoop.current.add(timer, forMode: .default)
}

@objc private func timerAction(timer: Timer) {
    self.label.text = "\(Int.random(in: 1...10)) on Context: \(leoName)"
}
Features of Timers in Swift
You can add some context information to your timer. Using the userInfo initializer:
timer = Timer(timeInterval: 2, target: self, selector: #selector(timerAction), userInfo: ["name":"leo"], repeats: true)

RunLoop.current.add(timer, forMode: .default)
And modifying the timerAction function to :
@objc private func timerAction(timer: Timer) {
    guard let dict = timer.userInfo as? [String: String], let leoName = dict["name"] else { return }
    self.label.text = "\(Int.random(in: 1...10)) on Context: \(leoName)"
}
You can also add tolerance for your Timers! Just add this property :
timer.tolerance = 0.5
Allowing the system flexibility when a timer fires increase the ability of the system to optimize for increased power savings and responsiveness. So if your timer doesn’t have strong timing constraints (no joke intended), you should use the tolerance to enable your system optimization.
So yeah, it’s pretty neat what you can do with Timers and Swift.
The short way
Not everyone wants to deal with the RunLoop explicitly. So if you are running (and I hope so) an iOS 10 or greater version, you can use the class functions provided by the Swift Foundation API.
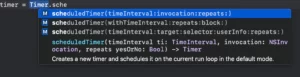
The scheduledTimer function returns the timer object created, so you can invalidate it later. The closure initializer can be used like this:
timer = Timer.scheduledTimer(withTimeInterval: 2, repeats: true) { timer in
    self.label.text = "\(Int.random(in: 1...10))"
}
And the selector initializer can be used with user info, like this:
timer = Timer.scheduledTimer(timeInterval: 2, target: self, selector: #selector(timerAction), userInfo: ["name": "Ana"], repeats: true)
The Timer Publishers – Using Timers in Combine
With Combine Framework you can replace your old Foundation Timers with the timer publisher. Import Combine in your ViewController and follow the example below:
Timer.publish(every: 2, on: .main, in: .common)
    .autoconnect()
    .sink() { [weak self] _ in
        self?.label.text = "\(Int.random(in: 1...10))"
    }.store(in: &cancellableSet)
Don’t forget to create your cancellableSet in class scope :
var cancellableSet = Set<AnyCancellable>()
And… that’s it!
Summary – Timer Types in Swift
So today we see two ways to initialize a Timer in Swift, pass some context information using the Apple userData pattern, add some tolerance to your timers, and how to implement it in Combine making your code look modern and reactive.
That’s all my people, I hope you liked reading this article as much as I enjoyed writing it. If you want to support this blog you can Buy Me a Coffee or leave a comment saying hello. You can also sponsor posts and I’m open to freelance writing! You can reach me on LinkedIn or Twitter and send me an e-mail through the contact page.
Thanks for reading and… That’s all folks.
Credits: image


