
Hallo allemaal, Leo hier. Today we will explore the new Preview macro and how you can level up your canvas with it.
Today I was browsing LinkedIn and one question from one of my iOS developers colleagues appeared. It was asking: What would you say to your younger self when you were starting your iOS developer career?
And I’ve been thinking about that. I could tell about how important is to learn Swift itself instead of focusing on UIKit ( when I started SwiftUI was just a daydream for real business). Or maybe to focus less on learning architectures and focus more on great testing capabilities.
I could even say that the books that I bought would be not very useful throughout my career, and the most important one was one about testing in Swift.
But in reality, I can’t say that would be good or bad advice. All the mistakes and successes that I had in my career were influenced by all the research that I do daily.
I read an entire book on iOS architecture just to realize that all architectures fall into two main categories, and that is all related to the direction of the messages. We have architectures where the data is exchanged within the same objects (MVVM, MVC, MVP, etc.) and we have architectures where the data is unidirectional like redux, TCA, VIP, etc.
Reading that book helped me in my interview process in the future when I had to discuss architecture with interviewers. However, I can’t say that helped me in my daily job at all. I think the two things that brought more value over time related to all my studies were learning the Swift language as deeply as I could and focusing on testing.
And I’m telling you this because I always advocate learning a little bit every day OUTSIDE your working hours. Because when you are working in something you are enclosed in a box that is your workplace/job/company. You have a lot of constraints such as the legacy code, business rules, architecture agreements, etc.
When you try to read an article or watch a video from someone who is not in your box, you have the opportunity to expand your mind beyond everyone else in your environment. I think that was the most valuable lesson for my younge self, I would say to continue studying every day something that could or not be related to the current work, and that everyday little studies in the long term start to sum up building a robust knowledge collection.
Talking about things that I study outside work, SwiftUI’s new APIs are perfect for that. For example, this struct that enables you to create several designs for a view depending on the frame that was given to it.
And it is okay if your studies after/before working don’t give you immediate results in your daily jobs, because the idea is to present yourself with new techniques/APIs/ways of work/metaphors etc. I really like Combine and I think it was one of the greatest additions to our iOS environment lately. In this article, you will learn how to use scan and reduce operators with it, check it out!
No more talking let’s code, but first…
Painting of The Day
I chose a painting from 1865 by John Everett Millais, and it’s called Esther.
It shows Esther from the Bible getting ready to see her husband, the Persian king. She could be in big trouble for showing up without an invitation, but she’s doing it to warn him about a plan to hurt the Jews.
I chose this painting because she is previewing herself before showing up to the king. That is the same for our apps that are being prepared using Preview Canvas before appearing in the app store.
The Problem – Take advantage of the new Preview Macro in Xcode 15
Imagine that you have several view configurations and you want to know how they look in very specific scenarios.
First, let’s check how previews were done in the past. The that we had to have SwiftUI previews in the past, was using PreviewProvider for example:
struct MyProvider: PreviewProvider {
    static var previews: some View {
        ContentView()
    }
}
And every time you create a new Preview. You have to write all that boilerplate code. That was:
- Create a new struct
- Conform that new struct to PreviewProvider protocol
- Create a static var previews and add all the code there.
Thankfully with the new Swift macros, the teams from Apple had a great idea to add a new Macro that we could use to remove all that boilerplate code. Now we just need to add #preview {}.
All that code was reduced to this:
#Preview {
    ContentView()
}
Really smooth, huh?
Now let’s explore interesting tips and things that you can do with it.
Showing Several Previews For the Same File with Preview Macro
Nothing stops you from using several previews in the same file. It is a way to organize all the possible states of your view in a single file. For example, you want to see how your view would look in dark mode and light mode. You can easily do this:
#Preview {
    ContentView()
        .preferredColorScheme(.light)
}

#Preview {
    ContentView()
        .preferredColorScheme(.dark)
}
This would generate two previews
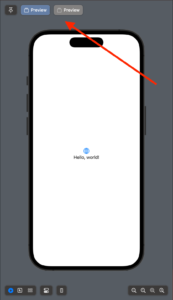
This is really cool, and now we can check both dark and light modes in the same preview. This is a really good shortcut, but we can improve this. Looking at the image above you can’t say what preview is light and what preview is dark. The next tip will solve this problem.
How to Label Previews Using New Macro Preview
To solve the problem stated above, we can add titles to our previews using the new macro. Check the code below:
#Preview("Light") {
    ContentView()
        .preferredColorScheme(.light)
}

#Preview("Dark") {
    ContentView()
        .preferredColorScheme(.dark)
}
Now you will see that the labels on the Canva changed:
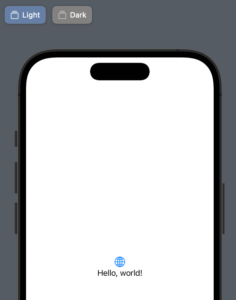
Now your previews are organized and you know where every mode is previewed.
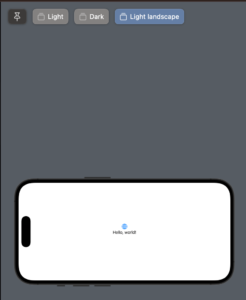
How to Use Landscape Mode with the New Preview Macro in SwiftUI?
Well, that would be amazing if the problems for iOS developers would just be light/dark mode, right? We have to deal with a myriad of screens. And not only different screen sizes but also different orientations.
The former we have help using its traits. Check the example below:
#Preview("Light landscape", traits: .landscapeRight) {
    ContentView()
        .preferredColorScheme(.light)
}
And the result is:
Now let’s try a more complex example and of course that will involve UIKit.
Can you use the new macro with UIKit views? I bet you already know the answer, of course, yes! Let’s see how to do it.
How to Use UIViewController with the new Preview Macro?
To use them is exactly how you would do with the former PreviewProvider. There are only 2 steps ( Thanks Rambo for the feedback!):
- Create your UIViewController with all your views inside.
- Use that new UIViewController in your previews.
Let’s check each one of the steps. First, let’s create a UIViewController that just has a button inside:
final class ButtonContainer: UIViewController {
    private let buttonTitle: String

    init(buttonTitle: String) {
        self.buttonTitle = buttonTitle
        super.init(nibName: nil, bundle: nil)
    }


    override func viewDidLoad() {
        let button = UIButton(configuration: .borderedProminent(), primaryAction: nil)
        button.setTitle(buttonTitle, for: .normal)
        button.translatesAutoresizingMaskIntoConstraints = false
        view.addSubview(button)

        NSLayoutConstraint.activate([
            button.centerXAnchor.constraint(equalTo: view.centerXAnchor),
            button.centerYAnchor.constraint(equalTo: view.centerYAnchor)
        ])
    }

    required init?(coder: NSCoder) {
        fatalError("init(coder:) has not been implemented")
    }
}
Now you can use the button container in the preview macro:
#Preview("UIKit Portrait") {
    ButtonContainer(buttonTitle: "Next Screen")
}
And now you can see your UIViewController using previews! Really cool, right?
Summary – Using Preview Macro to Quickly Test Different Layouts
The new Preview macro in Xcode 15 is indeed a game-changer for iOS developers. It streamlines the workflow, making it incredibly easy to test out different scenarios, themes, or configurations without wading through boilerplate code.
This feature neatly ties back to the overarching theme of this article: the value of continuous learning and adapting. Just as we must continually update our knowledge and skills to stay ahead in this rapidly evolving field, tools like the Preview macro help us adapt our code to meet the ever-changing demands and standards of the iOS ecosystem.
So, if I had one last piece of advice to give my younger self, or any budding iOS developers out there, it would be to embrace change—both in terms of personal growth and in the tools you use. Don’t get so locked into current practices that you become resistant to new ways of doing things.
Keep learning, keep experimenting, and don’t forget to step outside your “box” to gain a broader perspective.
Tools like the Preview macro aren’t just conveniences; they’re opportunities to rethink and refine your approach to coding, enabling you to become a more versatile and effective developer.
Fellow Apple Developers, that’s all.
I hope you liked reading this article as much as I enjoyed writing it. If you want to support this blog you can Buy Me a Coffee or say hello on Twitter. I’m available on LinkedIn or send me an e-mail through the contact page.
You can likewise sponsor this blog so I can get my blog free of ad networks.
Thanks for the reading and… That’s all folks.
Image credit: Featured Painting


