
Hallo vrijgezellen en getrouwden, Leo hier. Today let’s talk about something that I learned last week that are implicit and explicit animations in SwiftUI.
I know, I know… You are thinking: “Again is this guy talking about animations in SwiftUI”, but hold with me that I’m sure that you will learn something very interesting today.
Lately, I’ve been thinking a lot about writing about meta-programming, and I’m not talking about the new Macros in Swift. I’m thinking a lot about how your attitude counts way more as a developer than your hard skill in our daily jobs. I’m sure I wouldn’t be the best person to talk about that since it took more than a decade for me to feel mature talking about soft skills but hey I think now I’m pretty comfortable with mines.
One thing that was and kinda is still today is talking English all day long at my job. I feel so handicapped because my vocabulary is limited in English compared to my native language but that doesn’t stop me to do my best to over-communicating my ideas and make sure everyone understood what I was saying.
I’ve been writing about new stuff like the new expressions in Swift 5.9 and also I’ve been talking a lot about new tools such as Judo. One thing that I can share about my last discoveries is that the more I learn, the more certain about my ignorance I have. There is so much to learn out there.
Well, I think this will continue in another article because this one is about animation.
No more talk, let’s get animated! But first…
Painting of The Day
The painting I chose today is called “The Peasant Dance” a 1568 art piece by Pieter Bruegel the Elder.
Pieter Bruegel the Elder was a pivotal Flemish painter from the 16th century, known for his vivid landscapes and scenes of peasant life. His unique perspective and artistry mark the transition between the Renaissance and Baroque periods.
His masterpieces, like “Hunters in the Snow” and “Peasant Wedding,” showcase a profound understanding of human nature and the rural life of the time. His works have left an enduring legacy, inspiring artists and authors for generations.
I chose this painting because of the animation that the artist tried to portray in the painting. Everyone is dancing, so they are moving around. Like our views in this article!
The Problem – Animations Teleportation Bug in SwiftUI
You are trying to animate a view but some parts keep jumping around while other animate correctly.
To understand that problem we need first what a transaction in SwiftUI is, let’s have a quick look.
What is a Transaction in SwiftUI?
Transactions in SwiftUI are values that contain the context SwiftUI needs to understand when processing current state changes. They are especially important for holding the animation function used to calculate interpolation. Essentially, transactions provide the necessary information for SwiftUI to perform animations and other state-dependent changes in the app.
Transactions are generated whenever a state changes in a SwiftUI application. They are created based on whether the state change is initiated by explicit or implicit animation declarations and are then propagated throughout the required view hierarchy.
Transactions are implicitly passed down in the view hierarchy, similar to environment values. Their generation and dispatch is tied to the location and logic of explicit and implicit animations. Importantly, transactions cannot be generated or dispatched on their own; they are accompanying information for state changes.
They can be observed and manipulated using the .transaction modifier in SwiftUI. For instance, you can use it to monitor and print the animation function or control how and when a new transaction is created. Is not the scope of this article to present that modifier but maybe in the future!
In the context of animations in SwiftUI, the transaction holds the animation settings for state changes and is passed down to views that are impacted by these state changes. When a state change occurs, animatable components (usually conforming to the Animatable protocol) get the context (transaction) of this state change, acquire the animation curve function from the transaction, and use it to calculate the interpolation for the animation.
Now you already know what a transaction is let’s set up the code for today’s example.
Setting up the Code for Animations
Copy and paste the simple example below:
import SwiftUI

struct ContentView: View {

    @State var isExpanded = false

    var body: some View {
        VStack {
            Image(systemName: "globe")
                .imageScale(.large)
                .foregroundStyle(.tint)

            Rectangle()
                .frame(height: isExpanded ? 500 : 100)

            Text("Hello, world!")

            Button {
                isExpanded.toggle()
            } label: {
                Text("Change Size")
            }.buttonStyle(.borderedProminent)

        }
        .padding()
    }
}

#Preview {
    ContentView()
}
This will create this view:
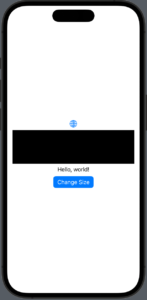
When you tap the button “Change size” the size of the black rectangle will change accordingly. Right when the user taps the button the rectangle aggressively changes its size followed by the image and the “Hello world” text.
But that is not what we want. We want our rectangle to change its size with some beautiful animation.
The first thing that we will try is implicit animations and see the results. But what are implicit animations?
Implicit Animations in SwiftUI
Implicit animation in SwiftUI is declared with the .animation or .transaction modifier on view branches, indicating what transaction should be created when the state changes. The transaction can be seen as a context that SwiftUI uses to calculate animations when processing state changes.
When a state change occurs in the application, SwiftUI generates new transactions based on the declaration of implicit animation on the view branch that triggered the state change. These transactions are then propagated in the required view hierarchy, informing how the animatable components (usually conforming to the Animatable protocol) should interpolate during the state change.
Implicit animations, as the name suggests, are created and controlled implicitly by SwiftUI when certain conditions or state changes occur in the user interface. And that changes everything because you don’t have control over them.
And also, they can change behavior from one version of SwiftUI to another, so BE CAREFUL using this.
With that in mind let’s add an explicit animation to our view:
import SwiftUI

struct ContentView: View {

    @State var isExpanded = false

    var body: some View {
        VStack {
            Image(systemName: "globe")
                .imageScale(.large)
                .foregroundStyle(.tint)

            Rectangle()
                .frame(height: isExpanded ? 500 : 100)
                .animation(.default, value: isExpanded) // add explicit animation here!

            Text("Hello, world!")

            Button {
                isExpanded.toggle()
            } label: {
                Text("Change Size")
            }.buttonStyle(.borderedProminent)

        }
        .padding()
    }
}

#Preview {
    ContentView()
}
With this change, we could animate the height of our rectangle! That’s really cool, but something looks odd. Test the code above and try to discover yourself…
If you pay attention to the animation that the code below generates you will observe that the Image and the “Hello World” texts are jumping and not moving along with the rectangle resizing animation.
That is because of what we explained above about implicit animations. Because SwiftUI will add the animation transaction only to the view that the implicit animation happens, other views are not affected by that animate transaction this way not animating them.
There are several things that you can do to fix that. For example, if you want to stick with implicit animations, instead of putting the animation modifier in the Rectangle, you could add it to the VStack.
Then SwiftUI engine would add that animation transaction to all its subviews check the code below:
import SwiftUI

struct ContentView: View {

    @State var isExpanded = false

    var body: some View {
        VStack {
            Image(systemName: "globe")
                .imageScale(.large)
                .foregroundStyle(.tint)

            Rectangle()
                .frame(height: isExpanded ? 500 : 100)

            Text("Hello, world!")

            Button {
                isExpanded.toggle()
            } label: {
                Text("Change Size")
            }.buttonStyle(.borderedProminent)

        }
        .animation(.default, value: isExpanded) // adding implicit animation here solves the jumping view problem too!
        .padding()
    }
}
See now we are saying to SwiftUI engine to animate all the views that we want!
However, that could be cumbersome sometimes. Imagine that there are a lot of views involved and you don’t want to hunt around what view you should add the implicit animation to make your code work.
Now is when the Explicit Animations save the day!
Explicit Animation in SwiftUI
Explicit animation in SwiftUI is created through imperative programming using the global functions withAnimation or withTransaction.
In explicit animations, regardless of where the withAnimation function is executed, SwiftUI will start dispatching the transaction created by the explicit animation from the root view. No matter the location of the withAnimation function execution, SwiftUI will begin to send the transaction produced by the “explicit animation” starting from the root view.
This differs from implicit animations as they are created and controlled explicitly by the developer. For instance, if the developer wants an animation to occur in response to a button press (and not in response to a state change), they would use explicit animation.
Let’s check the example below:
import SwiftUI

struct ContentView: View {

    @State var isExpanded = false

    var body: some View {
        VStack {
            Image(systemName: "globe")
                .imageScale(.large)
                .foregroundStyle(.tint)

            Rectangle()
                .frame(height: isExpanded ? 500 : 100)

            Text("Hello, world!")

            Button {
                withAnimation { // add the withAnimation explicit animation block here!
                    isExpanded.toggle()
                }
            } label: {
                Text("Change Size")
            }.buttonStyle(.borderedProminent)

        }

        .padding()
    }
}

#Preview {
    ContentView()
}
And now all the views in the hierarchy have the same transaction with the same interpolation animation function. The animation looks great and we can go all happy to home.
And we are done!
Summary – SwiftUI Animations Implicit Vs Explicit
In conclusion, understanding transactions in SwiftUI is integral to effectively managing animations in your applications. As we’ve explored, transactions provide the necessary context for SwiftUI to process state changes and carry out the required animations. They are automatically generated and dispatched whenever a state changes, be it through explicit or implicit animations.
By understanding the distinction between implicit and explicit animations, and their interaction with transactions, you can exercise greater control over how your views animate. Whether it’s an image or a text field, you can decide how the state change impacts the animation of your elements and ensure a smoother, more intuitive user interface.
We hope this guide has been helpful in clarifying the role of transactions in SwiftUI and how they can be utilized to enhance your app’s animations.
Keep experimenting and exploring these concepts further for creating more engaging and visually appealing apps with SwiftUI.
Fellow Apple Developers, that’s all.
I hope you liked reading this article as much as I enjoyed writing it. If you want to support this blog you can Buy Me a Coffee or say hello on Twitter. I’m available on LinkedIn or send me an e-mail through the contact page.
You can likewise sponsor this blog so I can get my blog free of ad networks.
Thanks for the reading and… That’s all folks.
Image credit: Featured Painting


