
Hallo heksen en tovenaars, leo hier. The topic today is how to make animations with UIImageView in Swift and bring life to your apps just using plain UIImage objects.
Today we will explore an API that I discovered recently. Last week I had to animate the pin of a map. But it’s not animate it’s changing in a path, that I already covered in this article. I had to animate the pin itself.
So to do that I used a timer that changed the image on a regular basis in a UIImageView, and that’s when my colleague Mike Dammers told me about an API on the UIImageView that does exactly what I was performing with the timer.
Disclosure: I do not own the mega man sprites, this post is for educational purposes only and was picked up from a DMCA-compliant website.
Let’s dive into that API with mega man sprite animations. But first… The Painting!
Painting of The Day
This painting is an 1878 art piece called Winding the Skein by Frederic Leighton. Frederic Leighton, 1st Baron Leighton, PRA (3 December 1830 – 25 January 1896), known as Sir Frederic Leighton between 1878 and 1896, was an English painter and sculptor. His works depicted historical, biblical, and classical subject matter. Leighton was the bearer of the shortest-lived peerage in history; after only one day his hereditary peerage became extinct upon his death.
I chose this piece because the girl helping the woman is not very animated to help her.
The Problem – Animations with UIImageView in Swift
You have to repeatedly change images from a UIImageView on regular basis.
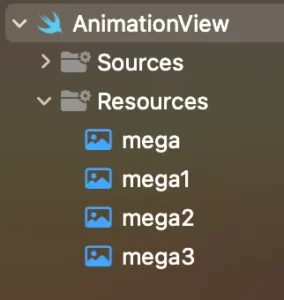
First, download all the mega man sprites and cut four of them, the static pose, and 3 running, call them mega, mega1, mega2, and mega3.
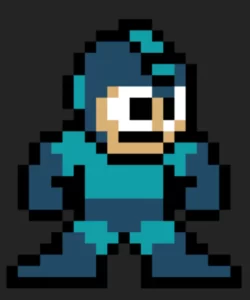
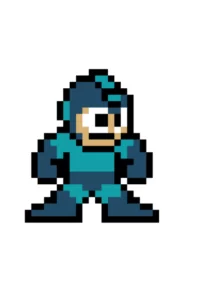
Mega.png – Static:

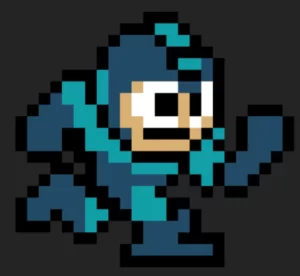
Mega1.png – First running pose :
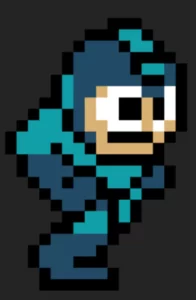
Mega2.png – Second running pose:

And Mega3.png – Third running pose:


Create a SingleView in Playgrounds. Then copy and paste all of them to the Resources folder:
Now let’s try just one static image with the code below:
import UIKit
import PlaygroundSupport

class MyViewController : UIViewController {
    override func loadView() {
        let view = UIView()
        view.backgroundColor = .white

        let imageView = UIImageView()
        imageView.frame = CGRect(x: 20, y: 120, width: 300, height: 300)
        imageView.image = UIImage(named: "mega")
        imageView.contentMode = .scaleAspectFit

        view.addSubview(imageView)
        self.view = view
    }
}
// Present the view controller in the Live View window
PlaygroundPage.current.liveView = MyViewController()
“`
The result should be:
Ok… perfect. Now let’s start to introduce the animation API.
Animation Images in UIImageView
To animate images with your UIImageView you have to do 3 steps:
- Set an array of UIImage in the
animationImagesUIImageView property. - Set the duration of all images in the
animation-durationUIImageView property. For example: if you put 2 images and set the animation duration to 1 second, each image will be on the screen for 0.5 seconds. Or if you set 4 images with the same 1-second duration, each image will be on the screen for 0.25 seconds. - Call
startAnimating()function in UIImageView.
Let’s do that, copy paste the code below on your Playground file overwriting the older one:
import UIKit
import PlaygroundSupport

class MyViewController : UIViewController {
    override func loadView() {
        let view = UIView()
        view.backgroundColor = .white

        let imageView = UIImageView()
        imageView.frame = CGRect(x: 20, y: 120, width: 300, height: 300)
        imageView.image = UIImage(named: "mega")
        imageView.contentMode = .scaleAspectFit


        let allMegas: [UIImage] = [1,2,3].compactMap { x in // Mark 1
            return UIImage(named: "mega\(x)")
        }

        imageView.animationImages = allMegas // step 1
        imageView.animationDuration = 0.3 // step 2
        imageView.startAnimating() // step 3

        view.addSubview(imageView)
        self.view = view
    }
}
// Present the view controller in the Live View window
PlaygroundPage.current.liveView = MyViewController()
Mark 1 is necessary because the UIImage initialization returns an Optional<UIImage>, this way need somehow unwrap it. And for our luck, we already called all the images in a way that is easy to call them sequentially. So we just need to use a compactMap function to get the image array.
In the steps above we execute what we explained before.
The result of this code should be:
Tweaking the animation
Would be nice if the mega man stopped a little bit and after starting to run.
Let’s do that:
import UIKit
import PlaygroundSupport

class MyViewController : UIViewController {
    override func loadView() {
        let view = UIView()
        view.backgroundColor = .white

        let imageView = UIImageView()
        imageView.frame = CGRect(x: 20, y: 120, width: 300, height: 300)
        imageView.contentMode = .scaleAspectFit

        let allMegas: [UIImage] = (1...3).compactMap { x in
            return UIImage(named: "mega\(x)")
        }

        var runningMega = allMegas + allMegas + allMegas

        (1...8).forEach { _ in
            guard let megaImage = UIImage(named: "mega") else { return }
            runningMega.insert(megaImage, at: 0) // Mark 1
        }

        imageView.animationImages = runningMega
        imageView.animationDuration = 1
        imageView.startAnimating()

        view.addSubview(imageView)
        self.view = view
    }
}
// Present the view controller in the Live View window
PlaygroundPage.current.liveView = MyViewController()
The only difference now is that we are inserting at position zero, at Mark 1, the initial mega man still frames. We could have used compactMap to generate the array of UIImage but I don’t want to traverse it two times.
The result should be this:
And that’s it!
Summary – Animations with UIImageView in Swift
Today you learned that we can make cool animations with just an UIImageView and a bit of pixel art. It’s always important to seek native ways to do whatever we are doing. Remember the old quote: less code, fewer problems.
That’s all my people, I hope you liked reading this article as much as I enjoyed writing it. If you want to support this blog you can Buy Me a Coffee or leave a comment saying hello. You can also sponsor posts and I’m open to freelance writing! You can reach me on LinkedIn or Twitter and send me an e-mail through the contact page.
Thanks for reading and… That’s all folks.
Credits:


