Hello my friends, Leo here. The topic today is how to make great iOS app navigation with Tab Bar.
Today we’ll explore some UI/UX techniques about how Apple recommends the use of a tab bar in-app navigation.
The tab bar is used by a variety of apps and Apple uses it a lot for example in App Store, Podcasts, Clock, and so on. It’s a great tool when used right so let’s dive in on how to make great navigation with Tab Bar.
Let’s go!
First Things First
What is a Tab Bar? The image below says more than a thousand words…

We can call that visual element a tab bar when…
- Appears at the bottom of the App screen
- Maintain the same height in ALL screen orientations
- It doesn’t perform an action other than strict navigation. For example, you shouldn’t use a tab bar item to do an HTTP request.
- You can have the number of items you want, but the number it will appear on the screen will be limited by the screen size. The items that don’t fit in it should be aggregated in the “More” tab item.
As you can see above when you put a Tab Bar in your app, you are making a bunch of choices with it. It means every screen in your app besides modal views will contain the Tab Bar, and you have to think if this is the right design decision. Many great doesn’t have Tab Bars because they choose another navigation style and that’s all right.
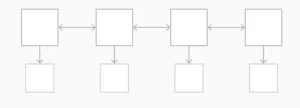
Below it’s the navigation style you will adopt when using the tab bar. You can check other navigation styles in Apple’s Human Interface Guidelines
It’s important to understand the difference between a tab bar and a toolbar because both types of bars appear at the bottom of an app screen.
A tab bar lets people switch among different sections of an app, such as the Alarm, Stopwatch, and Timer tabs in the Clock app. A toolbar contains buttons for performing actions related to the current context, like creating an item, deleting an item, adding an annotation, or taking a photo.
Now let’s check some tips and tricks.
Tips and tricks on how to make great iOS App Navigation with Tab Bar
So you decided that you will include the tab bar navigation in your app, that’s great but now should know that users are expecting some behaviors of it.
For example: Imagine that your app is showing a popover and the user taps another tab bar item, what should be your action? The popover must continue floating around and the view behind it should change? No, the app should always be predictable when using a tab bar, think of it as an idempotent operation. Anytime a tap a Tab Bar item I should get the same result, so in this popover situation, you should close the popover and show the other tab bar item screen.
General Strategies
You must define the reset behavior for the tab items. What should happen when the user scrolls to tab A then go to Tab B and tap back to tab A. In iOS the default behavior is to maintain the state of the tab where the user leaves it but this should be a design decision, and you have to make it consciously.
You can also put communication on the tab bar, and the badges are here to fill that role. It’s important to communicate unobtrusively with the user since the tab bar should be as clean as possible. The badge is that little red dot containing white text that’s either a number or an exclamation point.
It’s on you if the Tab Bar icons will have labels. Generally speaking, putting a label is the easiest way, but if you are 100% sure that the iconography is completely clear, you can remove the label to have an even cleaner design.
Do NOT EVER hide the tab bar. This is very very important if your user is expecting a flattened navigation experience you should always make that available this way your app will be more predictable and the overall experience will be better. There’s only one exception to this rule when you use modals views your users are expecting it’s a different experience than the regular app navigation because it’s a short action that self dismisses in the end.
Using SF Symbols
You can make use of the standard Apple’s SF Symbols to standardize the app experience with the Apple ecosystems. It’s always preferred to go for a known place for your users, for example: if your app has a favorite area that it’s a tab bar item, you can use the systems favorite icon this way your users won’t need to learn what means “Favorite” in your app because it’s already given when you choose the right icon.
Next steps on your UX Research
Some could argue that all decisions we make must be based on data, and this is all about this section. If you don’t have all the app’s usage metrics you can’t take data-driven decisions. The problem with this approach is that you can’t assure if you are taking better design decisions or not and your are blindly trying to know what the users really want.
So the tips here are:
- Get all the functionality data you can. How it’s used, for how long, and when the persona is using it. Every data you could extract from the app usage is a great starting point.
- Merge features that make sense into one tab, always looking at the data.
- Look at future features and how they would add to the actual Tab Bar. Do these Tab Bar arrangements still make sense?
- Prototype and make a lot A/B testing as possible. User-testing to support your hypothesis are crucial for a user-centric design.
You can read to the HIG article on Tab Bars, that’s the place I took a lot of info and a bunch of other articles at Google.
Summary – Make Great iOS App Navigation with Tab Bar
Think about it. Does your app really need a Tab Bar? Imagine that you have a single-purpose app, like the Calculator when you ask the famous UX question “What else I can do with this app” the answer could be “Nothing” at all because the target goal of your app is on your screen already. So plan ahead to make your app’s navigation fit the App’s purpose.
Of course, this is just an introductory thinking process about using Tab Bar, you should do good research about your app experience to have better insights on what fits better for your case.
This was my 2 cents about Tab Bars and if you have any comments please share them below.
That’s all my people, I hope you liked reading this article as much as I enjoyed writing it. If you want to support this blog you can Buy Me a Coffee or leave a comment saying hello. You can also sponsor posts and I’m open to freelance writing! You can reach me on LinkedIn or Twitter and send me an e-mail through the contact page.
Thanks for the reading and… That’s all folks.
Thanks for reading and… That’s all folks.
Credits – image
Ps: if you yourself about the post image, it’s because is a “Bar” (technically is a tavern, but ok). Got it?


