
Hallo vrienden, Leo hier. Today we will explore a wonderful world of sequential animations in SwiftUI.
Let me tell you about sequential animations in SwiftUI. They’re super cool because they let you animate multiple views or changes to views in a specific order. That means you can create some pretty intricate animations that have multiple steps and phases. And the best part is, SwiftUI makes it easy to create these animations, so you don’t have to be a seasoned developer to make some pretty slick animations in your app.
Sequential animations in SwiftUI can be used for all sorts of animations – like moving views along a path, animating changes to things like size, position, and color, and even making animations repeat, reverse, pause, and resume.
It’s super flexible and easy to use, so you can get creative and make your app stand out with some awesome animations. And trust me, with a little creativity and some understanding of the API, you’ll be making animations that bring your app to life in no time.
Before we dive into that I want to share something. I’m learning that SwiftUI has a lot of interesting stuff to give, and although some people say that SwiftUI is missing some things from UIKit, definitely you want to take a look into what is capable of when talking about error handling. There are several ways to show errors to the users and you might want to take a look into them.
Also, looking to enhance your SwiftUI styling knowledge? Then be sure to read A Beginner’s Guide to Styling Components in SwiftUI. This article is a must-read for anyone who desires to learn how to style and personalize their views in SwiftUI. The guide offers a comprehensive overview of styling components and provides practical examples and helpful tips to assist you in your journey.
No more talking let’s code! But first…
Painting of the Day
The painting I chose today is an 1860 art piece called “Lisbon. Sunrise” by Ivan Aivazovsky.
He lived from 1817 to 1900. A Russian painter who totally rocked at painting the sea and is considered one of the greatest marine artists ever. Actually, he was born into an Armenian family in Feodosia, a Black Sea port in Crimea, and spent most of his time there.
Aivazovsky left behind a legacy of over 6,000 paintings, starting with landscapes of the Crimean countryside and moving on to his famous seascapes and coastal scenes. He was especially good at playing with light in his paintings, using layers of color to create a really cool see-through effect. People love his technique and admire him for it.
I chose sunrise to be the painting today because day and night are sequential transitions of a day. Got it?
The Problem – How To Chain Animations in SwiftUI?
You want to animate your view sequentialy. First one, view then, another one and then the final one.
Your sprint started and now you know that you have an animation to deliver. Great! I’m always excited about animations in code, making things come to life, and giving freshness to the APP. But the problem is that animation is not all at the same time. First, you will animate the image, then the title, then the subtitle of the view, and lastly the top image will rotate.
The animation below is what we want to achieve today:
Let’s do it!
How to create sequential animations in SwiftUI?
This question can be also asked: How to chain multiple animations together in SwiftUI?
Well, let’s dive into that.
The starter view will be this one:
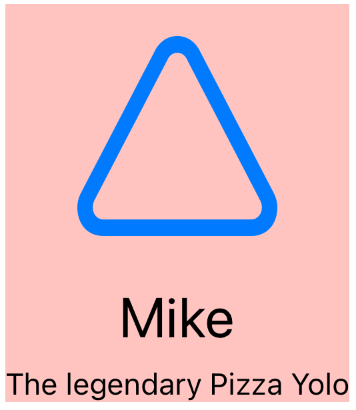
To create that let’s start a new SwiftUI project. This is a simple VStack with three Views, one image View, and two Text.
Now, substitute your current ContentView code with the following:
struct ContentView: View {
    @State var showPizza = false
    @State var showTitle = false
    @State var subtitleOpacity = 0.0
    @State var shouldRotate = true
    @State var shouldFinishRotation = false
    let animation = Animation.linear(duration: 2).repeatForever(autoreverses: false)

    var body: some View {
        VStack {
                Image(systemName: "triangle")
                    .resizable()
                    .foregroundColor(.accentColor)
                    .frame(width: 100, height: 100)
                    .padding()
                    .transition(.push(from: .trailing))
                    .ignoresSafeArea()
                    .rotationEffect(shouldRotate ? .degrees(0) : .degrees(360))


                Text("Mike")
                    .font(.title)
                    .transition(.push(from: .leading))
                    .ignoresSafeArea()

                Text("The legendary Pizza Yolo")
                .font(.subheadline)
                .opacity(subtitleOpacity)


        }
        .background(.red.opacity(0.3))
    }
}
With the code above set we can already see the view in the SwiftUI Canvas preview.
How do you animate changes to views in SwiftUI?
The next thing to do is to animate all the view transitions.
To do that we will add some conditionals, and animate their appearance. The plan is in the view ‘.onAppear’ function we will show all of the views using ‘.withAnimation’ closure.
Let’s check how to do that:
struct ContentView: View {

    @State var showPizza = false
    @State var showTitle = false
    @State var subtitleOpacity = 0.0
    @State var shouldRotate = true
    @State var shouldFinishRotation = false
    let animation = Animation.linear(duration: 2)

    var body: some View {
        VStack {
            if showPizza { // Mark 1
                Image(systemName: "triangle")
                    .resizable()
                    .foregroundColor(.accentColor)
                    .frame(width: 100, height: 100)
                    .padding()
                    .transition(.push(from: .trailing))
                    .ignoresSafeArea()
                    .rotationEffect(shouldRotate ? .degrees(0) : .degrees(360))
            }

            if showTitle { // Mark 1
                Text("Mike")
                    .font(.title)
                    .transition(.push(from: .leading))
                    .ignoresSafeArea()
            }

                Text("The legendary Pizza Yolo")
                .font(.subheadline)
                .opacity(subtitleOpacity) // Mark 1
        }
        .background(.red.opacity(0.3))
        .onAppear {

            withAnimation(.linear(duration: 1)) { // Mark 2
                showPizza = true
            }

            withAnimation(.linear(duration: 1).delay(1)) { // Mark 2
                showTitle = true
            }

            withAnimation(.linear(duration: 1).delay(2)) { // Mark 2
                subtitleOpacity = 1.0
            }

            withAnimation(animation.delay(3)) { // Mark 3
                shouldRotate = false
            }
        }
    }
}
In the Mark 1 comment, we are setting the view to not appear until the boolean or the opacity is changed. This way the view can react to changes and we will be able to animate the appearance of each of them separately.
Later, inside the ‘.onAppear’ function we are using the .withAnimation function using the duration and adding a delay to each one of them.
To create the animation sequentially in SwiftUI you will need to add a delay on the next animation which is the sum of all previous animation durations.
The example below is a great opportunity to learn, the first animation has only the duration, then the second animation has its own duration and a delay that is equal to the duration of the first one, then the third animation has its own duration and a delay that is the sum of the first animation duration and the second animation duration and the last animation is the sum of all previous animations durations.
Using this technique you can create animations like this:
Really cool, right?
How to control the duration and speed of sequential animations in SwiftUI?
In SwiftUI you can control the duration using the duration parameter of the animations. Like the example below:
withAnimation(.linear(duration: 1)) {
    showPizza = true
}
However, sometimes you want to adjust the speed of that animation too. The function can be tricky but after you think about it will be a breeze to use. The speed is a Double value that will divide your duration and that can cause confusion.
For example, if you have an animation that has 10 seconds, if you add 2.0 speed it will take 5 seconds instead because is 2 times faster. But for the same animation, if you add a speed of 0.5, it will take 20 seconds because is half of the default speed.
Check the examples below:
withAnimation(.linear(duration: 1).speed(2.0)) { // this is 0.5 seconds
    showPizza = true
}

withAnimation(.linear(duration: 1).speed(0.5)) { // this is 2 seconds
    showPizza = true
}
Kinda confusing at first, but if you think that speed is always there but with the value of 1 and the equation is duration/speed you will understand everything quickly.
How to make animations repeat in SwiftUI?
The example above is missing something. We want the rotation to be infinite. We don’t want to stop the delicious piece of pizza stop rotating. This way we can use the repeatForever function in the animation.
Using this your animation will do what you asked and rewind (go back) to the initial state.
Like the SwiftUI code example below:
struct ContentView: View {

    @State var showPizza = false
    @State var showTitle = false
    @State var subtitleOpacity = 0.0
    @State var shouldRotate = true
    @State var shouldFinishRotation = false
    let animation = Animation.linear(duration: 2).repeatForever() // <<<<< add repeatForever here!!!

    var body: some View {
        VStack {
            if showPizza {
                Image(systemName: "triangle")
                    .resizable()
                    .foregroundColor(.accentColor)
                    .frame(width: 100, height: 100)
                    .padding()
                    .transition(.push(from: .trailing))
                    .ignoresSafeArea()
                    .rotationEffect(shouldRotate ? .degrees(0) : .degrees(360))
            }

            if showTitle {
                Text("Mike")
                    .font(.title)
                    .transition(.push(from: .leading))
                    .ignoresSafeArea()
            }

                Text("The legendary Pizza Yolo")
                .font(.subheadline)
                .opacity(subtitleOpacity)
        }
        .background(.red.opacity(0.3))
        .onAppear {

            withAnimation(.linear(duration: 1).speed(2.0)) { // this is 0.5 seconds
                showPizza = true
            }

            withAnimation(.linear(duration: 1).speed(0.5)) { // this is 2 seconds
                showPizza = true
            }

            withAnimation(.linear(duration: 1).delay(1)) {
                showTitle = true
            }

            withAnimation(.linear(duration: 1).delay(2)) {
                subtitleOpacity = 1.0
            }

            withAnimation(animation.delay(3)) {
                shouldRotate = false
            }
        }
    }
}
Generating the result:
How to make sequential animations non-reversible in SwiftUI?
For this, you need to use the argument in the repeatForever function. The autoreverse parameter blocks the animations to reverse this way creating a smooth and infinite rotation in SwiftUI.
let animation = Animation.linear(duration: 2).repeatForever(autoreverses: false)
Now the animations will rotate forever in one direction only!
How do pause and resume animations in SwiftUI?
Stop an Animation that Repeats Forever
To create this experiment we will need to change things a little bit. Copy/Paste the code below:
struct ContentView: View {

    @State var showPizza = false
    @State var showTitle = false
    @State var subtitleOpacity = 0.0
    @State var animate = false
    @State var rotationAnimationTrigger = false
    let animation = Animation.linear(duration: 1).repeatForever()

    var body: some View {
        VStack {
            if showPizza {
                Image(systemName: "triangle")
                    .resizable()
                    .foregroundColor(.accentColor)
                    .frame(width: 100, height: 100)
                    .padding()
                    .ignoresSafeArea()
                    .id(animate) // this is used to reset the view and force redraw
                    .onChange(of: animate) { shouldRotate in // add this on change modifier
                        if shouldRotate {
                            withAnimation(animation) {
                                rotationAnimationTrigger = true
                            }
                        } else {
                            rotationAnimationTrigger = false
                        }
                    }
                    .rotationEffect(.degrees(animate ? (rotationAnimationTrigger ? -360 : 360) : 0.0)) // change the rotation effect
            }

            if showTitle {
                Text("Mike")
                    .font(.title)
                    .transition(.push(from: .leading))
                    .ignoresSafeArea()
            }

                Text("The legendary Pizza Yolo")
                .font(.subheadline)
                .opacity(subtitleOpacity)

            Button("\(animate ? "Stop" : "Start") Animation") { // add this button
                animate.toggle()
            }
        }
        .background(.red.opacity(0.3))
        .onAppear {

            withAnimation(.linear(duration: 1).speed(2.0)) { // this is 0.5 seconds
                showPizza = true
            }

            withAnimation(.linear(duration: 1).speed(0.5)) { // this is 2 seconds
                showPizza = true
            }

            withAnimation(.linear(duration: 1).delay(0)) {
                showTitle = true
            }

            withAnimation(.linear(duration: 1).delay(0)) {
                subtitleOpacity = 1.0
            }

        }
    }
}
Four steps were necessary to stop a repeatForever animation here:
- Use the view id to force the redraw of the view.
- Add an onChange function to the view that we want to stop to control if it is being animated or not.
- Change the rotation Effect to respond to state changes.
- Add a button to control the animation’s start and stop.
Rendering the result:
If you asked me before I’m searching for this article if doing if I think it was easier to stop animations in SwiftUI, I would say yes. But with our current APIs, this is not.
How to Combine and Chain Animation Effects in SwiftUI?
When you use the transition function to create your own animations.
For example, if we want to create a transition that will combine the view coming from the trailing plus the opacity changing, you can use this:
Image(systemName: "triangle")
    .resizable()
    .foregroundColor(.accentColor)
    .frame(width: 100, height: 100)
    .padding()
    .transition(.push(from: .trailing).combined(with: .opacity)) // <<<<< combined animations function
    .ignoresSafeArea()
    .rotationEffect(shouldRotate ? .degrees(0) : .degrees(360))
How to use spring animations in SwiftUI?
With spring animations, your views will have literally a spring effect. You can control a lot of properties on those, but today I’ll leave here just an example of how to use them in the current project.
Change the .onAppear blog to use the interpolatingSpring:
withAnimation(.interpolatingSpring(stiffness: 300, damping: 10)) { // this is 0.5 seconds
    showPizza = true
}
And the result now is:
And we are done for today!
Other Options to do Sequential Animations
Nothing stops you from using UIKit views in SwiftUI. So if you already have all your complex animations done in UIKit, maybe would be easier just to use them in your SwiftUI views. As we continue developing with SwiftUI the need for UIKit tends to decline however we shouldn’t be afraid to do it when it is necessary/more practical.
Some ideas in UIKit would be using the completion closure of the e animate(withDuration:delay:options:animations:completion:) function, or could use keyframe animations too.
Summary – Sequential Animations in SwiftUI
Today we went through a lot. Sequential Animations in SwiftUI offer a powerful and intuitive way to create dynamic and engaging user interfaces. By leveraging the power of SwiftUI’s animation system, developers can easily create complex and beautiful animations that add polish and delight to their apps.
With a few lines of code, animations can be sequenced and coordinated to create more intricate and expressive user experiences, making SwiftUI an excellent choice for building modern, interactive apps.
Fellow Apple Developers, that’s all. I hope you liked reading this article as much as I enjoyed writing it.
If you want to support this blog you can Buy Me a Coffee or say hello on Twitter. I’m available on LinkedIn or send me an e-mail through the contact page.
You can likewise sponsor this blog so I can get my blog free of ad networks.
Thanks for the reading and… That’s all folks.
Image credit: Featured Painting


