Hallo mijn vrienden, Leo hier. Today we will study an animated background in SwiftUI.
SwiftUI definitely makes things easier, components that in the past you should spend days trying to do you can now do it in minutes. This is also true for animations.
I love animations, and that is one of the topics that I enjoy most when I started to study iOS. When you make things on the screen move, you are giving the “swoooosh feeling” to the user. I know, I know, I can’t describe what is the “swoooosh feeling” but you know exactly what I’m talking about.
Some time ago, I was reading Twitter, and one of the iOS developers that I follow said something among these lines: “Keep iOS animations fast”. And I totally agree, there’s a fine tune between a “swoooosh feeling” and total cringes when talking about animations. Imagine if when you tap to open an app, the expanding animations from the home screen took 3 seconds. That would be terrible!
It is also good to mention that this is not the first time we approach SwiftUI animations in Holy Swift, we already created an animated home screen in SwiftUI that you can study as well.
And if you are not interested at all in SwiftUI animations, one of my favorite articles is about creating pixel art animations using just UIImageViews, it definitely worth reading.
No more talking, let’s code! But first…
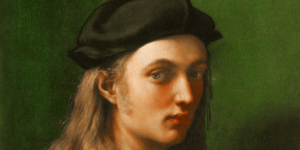
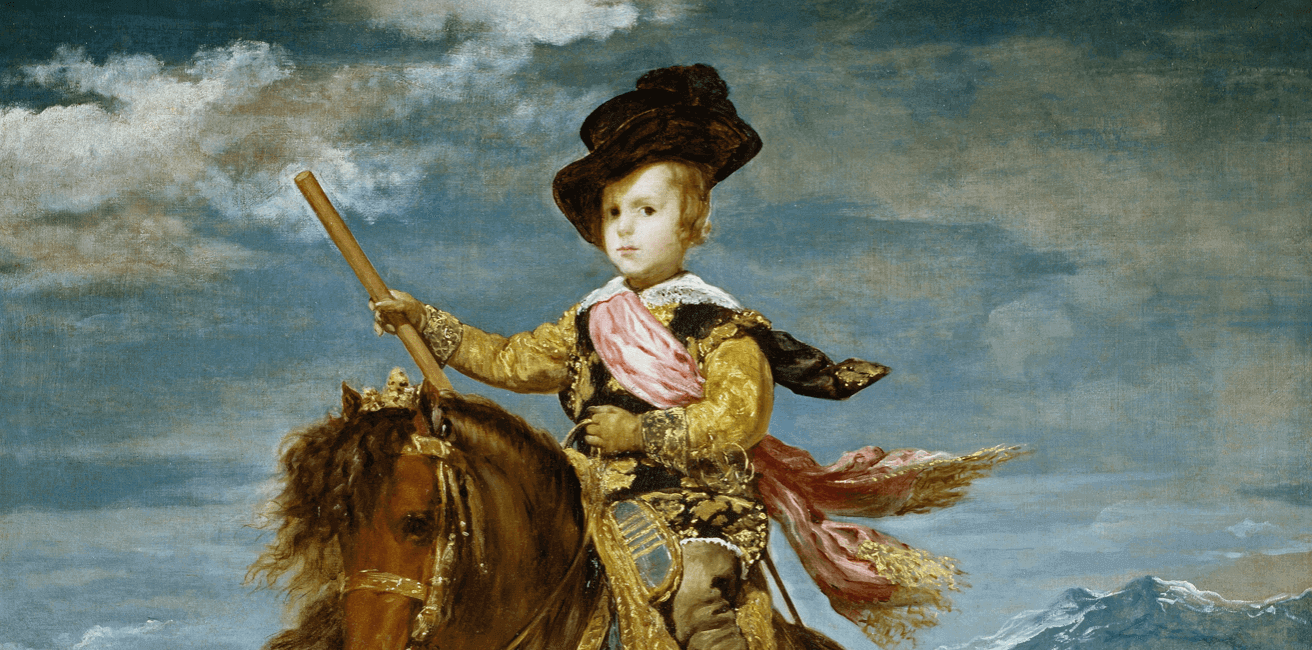
Painting of the Day
The painting I chose today is called Prince Balthasar Carlos on horseback by the baroque master Diego Velazquez.
Diego Rodríguez de Silva y Velázquez was born on June 6, 1599, and died on August 6, 1660. The leading artist in the court of King Philip IV, and one of the most important painters of the Spanish Golden Age. He was an individualistic artist of the contemporary Baroque period. In addition to numerous renditions of scenes of historical and artistic significance, he painted scores of illustrations of the Spanish royal family, other famous European figures, and commoners, pinnacling in the production of his masterwork Las Meninas (1656).
I chose this painting because I found it funny to such a young kid riding a small horse.
The Problem – SwiftUI Animated Image
You want to animate the background view of a text
What we want to do. I want to have control over the shape behind a text view.
And we will also learn how to control that with a slider.
SwiftUI Background Animation Setup
First, create a new project with SwiftUI as the UI framework.
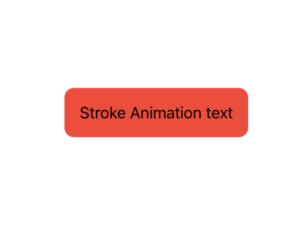
Now let’s create our text with a red rounded rectangle background .
struct ContentView: View {
    var body: some View {
        VStack {
            Text("Stroke Animation text")
                .padding()
                .background {
                    RoundedRectangle(cornerRadius: 10)
                        .foregroundColor(.red)
                }
        }
    }
}
Resulting in:
And that will be the base for all animations today.
Add Animation to the Background
There is an interesting function in SwiftUI to trim views. Check below its declaration:
func trim(from startFraction: CGFloat = 0, to endFraction: CGFloat = 1) -> some Shape
It states that it trims the shape by a fractional amount based on its representation as a path. This means that whichever shape you want to trim, the function will use the shape’s path to create a fraction of the total shape and show it on the screen.
In the real world, we can use that to create animations around it. Check below:
struct ContentView: View {
    private let timer = Timer.publish(every: 2, on: .main, in: .common).autoconnect()

    @State var animationTick = true

    var body: some View {
        VStack {
            Text("Stroke Animation text")
                .padding()
                .background {
                    RoundedRectangle(cornerRadius: 10)
                        .trim(from: animationTick ? 0 : 1, to: animationTick ? 1 : 0) // the trick is here
                        .foregroundColor(.red)
                }.onReceive(timer) { _ in
                    withAnimation(.linear(duration: 1.5)) {
                        animationTick.toggle()
                    }
                }
        }
    }
}
Let’s explain this a little more.
SwiftUI Animation Completion
We are using the withAnimation completion closure so every time we receive a new change in the timer we just animate the toggle of the variable animationTick.
When you animate both of the values in the trim at the same time, we can create this ‘gauge’ish effect. But why? As we are animating at the same time “from” parameter 0 to 1 and “to” parameter 1 to 0, the effect is that the ‘from’ parameter is going up while the ‘to’ parameter is going down and vice-versa. This way creating a really cool effect.
Resulting in this neat animation:
But Leo, I want more control over this. How can we do that?
Using Slider View to control your Animation
As we said before, the animation is really simple and we are just playing with some values. We can use those values to control the animation with a slider. Check the example below:
struct ContentView: View {
    @State private var sliderValue = 0.0
    @State private var isEditing = false

    var body: some View {
        VStack {
            Text("Stroke Animation text with Slider")
                .padding()
                .background {
                    RoundedRectangle(cornerRadius: 10)
                        .trim(from: CGFloat(sliderValue/2.1), to: 1 - CGFloat(sliderValue/2.1) )
                        .foregroundColor(.red)
                }

            Slider(
                value: $sliderValue,
                in: 0...1)

        }
        .padding()
    }
}
Now inside the trim function we have the slider value as our control point. We can now move to the exact point that we want with this kind of technique.
Check the result below:
Cool, isn’t it?
Stroke Line Animation in SwiftUI
The last thing I want to show you today is that with very little change we can have a totally different animation outcome using the stroke function.
The stroke function in SwiftUI is a view function that returns a new shape that is a stroked copy of self with line width defined by line and all other properties of Stroke having their default values. In other words, return the same shape but only the outline line of it.
And what would happen if we add the stroke function after trimming it?
Let’s check!
struct ContentView: View {
    private let timer = Timer.publish(every: 1.5, on: .main, in: .common).autoconnect()

    @State var animationTick = true

    var body: some View {
        VStack {
            Text("Stroke Animation text")
                .padding()
                .background {
                    RoundedRectangle(cornerRadius: 10)
                        .trim(from: animationTick ? 0 : 1, to: 1) // we changed this a little bit
                        .stroke()
                        .foregroundColor(.red)
                }.onReceive(timer) { _ in
                    withAnimation(.linear(duration: 1)) {
                        animationTick.toggle()
                    }
                }
        }
        .padding()
    }
}
Note that now we are not animating the “to” parameter in the “trim” function.
Resulting in this neat animation:
Amazing, right?
And that’s it for today!
Summary – SwiftUI Animations with Trim and Stroke
Today we learned three types of animations using trim to animate simulate a background animation and stroke to simulate an outline animation.
It is interesting to notice that you can animate things in SwiftUI not necessarily animating the component itself, but you actually animate the values that the component or function receives. This abstraction release the developer to think too deeply about how animation should work and that simply happens.
Fellow developers, that’s all. I hope you liked reading this article as much as I enjoyed writing it. If you want to support this blog you can Buy Me a Coffee or just say hello on Twitter. You can reach me on LinkedIn, or send me an e-mail through the contact page.
You can also sponsor this blog so I can get my blog free of ad networks.
Thanks for the reading and… That’s all folks.
Image Credit: Wikiart